Over a year ago we changed our flooring and have been talking about changing the countertops so they "fit" in with the new look. Well after all that talk about the countertops and all that waiting I decided to take this matter into my own hands. So I got out my tools on Friday night and started this project as John closed his eyes and waited for the moment to tell me........ it won't work.
I was determined to change this look of 90's Hunter Green. Here is how the kitchen looks before.

Yes I know I should have done my dishes before starting and I should have cleaned off the counters but I get excited and can't wait to start and cleaning isn't the fun part.
Here is my main tool.

A paintbrush is all I need. Remember John always says if it doesn't move eventually I will paint it. So since we didn't replace them in over a year I painted them. They begin with two coats of the base color. This paint is really sticky and stinky. We got company on Friday and I totally got all of us high on the fumes as John feed them drinks.

I ran out of the base coat on Friday night and had to wait till morning to go buy more.
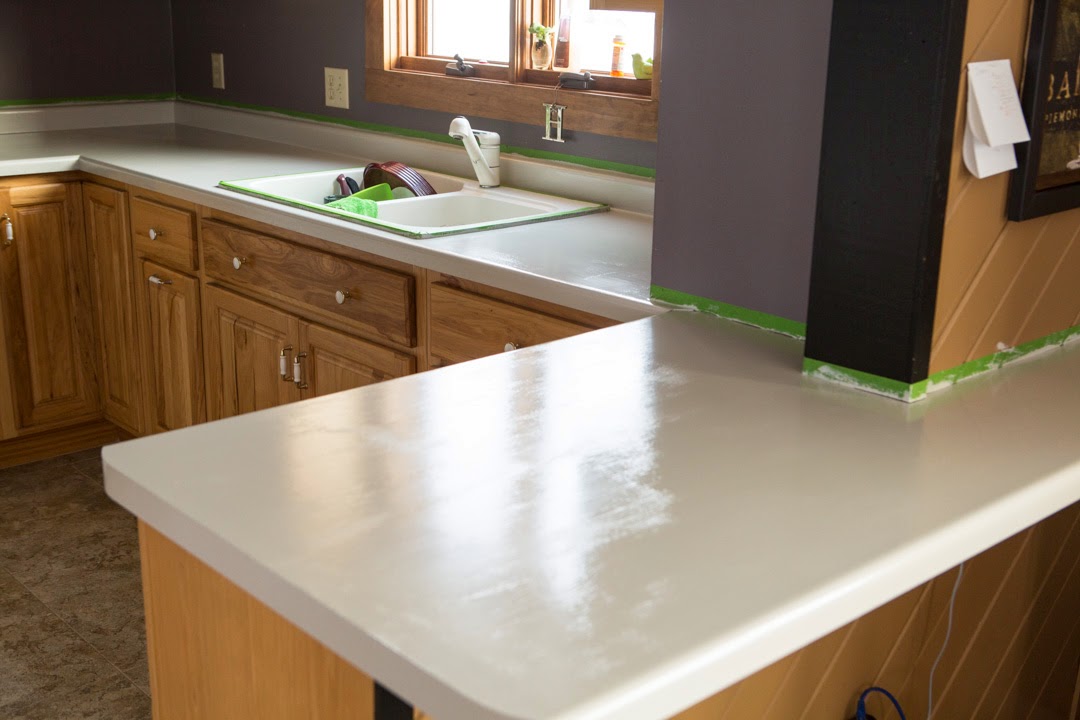
I was worried about the roller and brush strokes because I could feel them and see them but it's too late to turn back now...... and the change we are seeing already is huge. Friday night at midnight I'm still painting and didn't realize I only had the spotlights on and not the overhead light. That's not normal our kitchen is always dark at night but it must have been the dark counters absorbing the light.
The next steps involved making a marble like pattern with 4 different colors of the paint. To do this pinterest recommended a sea sponge. I could not bring myself to buy one of them, that is so 80's and I didn't like that effect back then I'm certainly not going to like it now. So I used scrunched up paper toweling dipped in the paint colors. But the paper toweling would get sticky with paint and stick to the counter so I used a plastic grocery bag, worked fantastic.

This is the point where John left the house, he couldn't take it anymore. It was looking like a random splatter of colors and the gold color was ugly. He rode the 4-wheeler out to the woods and said he'd be back in time for us to go out with the kids.

I used a cereal box ripped in half to make some veining lines.


I have to tell you that I hated it at this point. Too defined and chopping looking. But there is no turning back so I kept going with the last color and the white calmed it all down and brought everything together.

Here is after.


The paints were chosen from the floor color but I didn't wan't it too matchy. It looks totally different in these photos because of the change in distance but they match but with the counters being much lighter than the flooring.

Went out for supper with the kids giving the paint a chance to really cure and the house to air out. Sunday I put a few items back onto the counters but we aren't using them yet for daily use. We'll give them a few days to cure......... oh and John can't stop looking at them, he thinks it's awesome.

Don't worry I changed the snow day chalkboard today but not till after the picture was taken.

Next up for paint is that telephone cabinet..... it's stood still long enough in that shabby white state.

This is a totally different look and so far it's fabulous. I stop and stare at them every time I walk through. If you have 90's countertops to replace use the painting method it's much, much cheaper. If you need to get a closer look before taking the plunge come on over and feel them for yourself.
No comments:
Post a Comment